Connecting appointments
To set up connecting appointments, first go to Settings > Extra functionality, check the ‘Connecting appointments’ option, and click Save at the bottom.
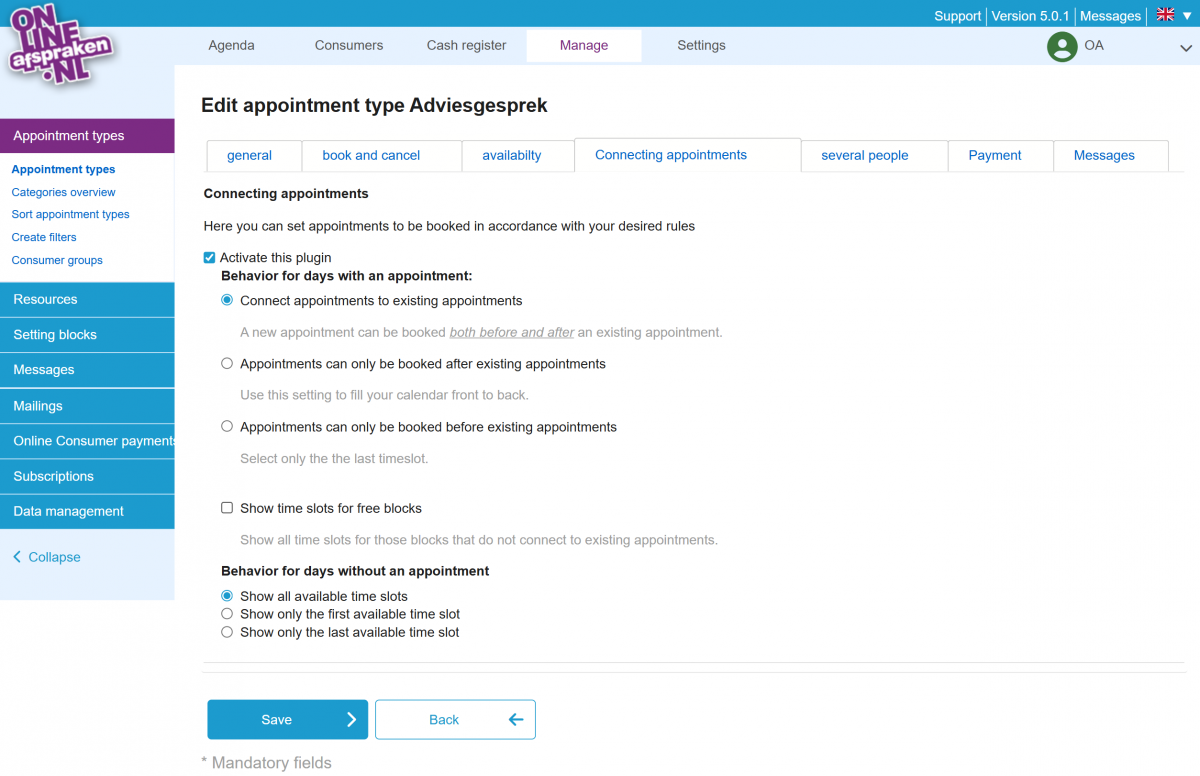
Go to Manage > Appointment types and select the appointment type to which connecting appointments apply. Then click edit (pencil icon), go to the 'Connecting appointments' tab, and check ‘Activate connecting appointments’. You can then determine the behavior for days when an appointment is scheduled and days when no appointment is scheduled.
The ‘Connecting appointments’ option works as follows:
- If no appointment is scheduled on a day, the client sees all available times.
- Once an appointment is scheduled, the client only sees the time directly before and directly after the scheduled appointment.
You can also check ‘Show time slots in free blocks’. This only has an effect if multiple available blocks have been created on a day. For example, in the morning and in the afternoon with a break in between. If only a morning appointment is scheduled, all possible times in the afternoon are still shown (and in the morning only the time before and after the appointment). Once an afternoon appointment is also booked, only the time before and after it is shown in the afternoon as well.
With the ‘first available’ or ‘last available’ function, only the first or last time slot is shown to the client.